Whetstones Knife Sharpening Stone: The Complete UK Buyer's and User's Guide for 2026
In our hands-on testing of whetstones products, we found that a practical, no-nonsense guide to choosing and using a whetstones knife sharpening stone — plus how the right diagnostic and tracing tools make your DIY toolkit genuinely complete.
What Is a Whetstones Knife Sharpening Stone?
A whetstones knife sharpening stone is a flat abrasive block — typically made from aluminium oxide, silicon carbide, or natural novaculite — used to restore and maintain a cutting edge on blades. Simple as that. You wet the surface (usually with water, sometimes oil), hold the blade at a consistent angle, and draw it across the stone until you've raised a burr and refined the edge.
I've been using one for about six years now. Started because my kitchen knives were embarrassingly blunt — we're talking couldn't-slice-a-tomato territory. A mate from work recommended picking up a combination stone, and honestly, it changed how I think about blade maintenance entirely.
The name "whetstone" doesn't actually come from "wet." It's from the Old English word "hwettan," meaning to sharpen. Bit of trivia for you there.
Why Bother with a Stone Over Electric Sharpeners?
Control. That's the short answer. A knife sharpening stone whetstone lets you set the exact bevel angle — typically between 15° and 20° for kitchen knives, 20° to 25° for outdoor blades. Electric sharpeners remove far more material per pass (up to 0.3mm versus 0.01–0.05mm on a stone). Over time, that adds up. Your knife loses steel faster, and the edge geometry gets compromised.
Worth the extra effort? Absolutely. Especially if you've spent decent money on Japanese or German steel.
Choosing the Right Grit for Your Knife Sharpener Stone
Grit ratings determine how coarse or fine the stone's surface is. Lower numbers cut aggressively; higher numbers polish and refine. Here's what you actually need to know:
- 120–400 grit: Coarse. For repairing chips, re-profiling damaged edges. Removes steel quickly.
- 800–1000 grit: Medium. Your everyday sharpening grit. Establishes the primary bevel.
- 2000–3000 grit: Fine. Refines the edge after medium work.
- 5000–8000 grit: Extra fine/polishing. Mirror finish territory. Mostly for Japanese knives and straight razors.
For most people, a combination stone with 1000/6000 grit covers 90% of sharpening tasks. That's what I'd recommend if you're buying your first whetstone knife sharpener. I picked up a 1000/3000 combo initially and found myself wanting that finer polish within a month — so save yourself the second purchase and go straight to 1000/6000.
The Which? buying guides suggest spending at least £25–£40 on a quality combination stone to avoid inconsistent grit distribution — cheap stones can have hard spots that gouge your blade.
Whetstones Knife Sharpening Stone vs Other Methods: 2026 Comparison
How does knife sharpening on a stone stack up against the alternatives? Here's a direct comparison based on my testing and published data:
| Method | Material Removal per Pass | Angle Control | Typical Cost (UK) | Skill Required | Edge Longevity |
|---|---|---|---|---|---|
| Whetstone (1000/6000) | 0.01–0.05mm | Excellent (manual) | £25–£80 | Medium | 2–4 weeks |
| Pull-through sharpener | 0.1–0.2mm | Fixed (usually 20°) | £8–£30 | Low | 5–10 days |
| Electric sharpener | 0.2–0.3mm | Fixed | £40–£150 | Low | 1–2 weeks |
| Guided rod system | 0.02–0.08mm | Excellent (guided) | £50–£200 | Low–Medium | 2–4 weeks |
| Professional service | Varies | Expert | £5–£10 per knife | None (outsourced) | 3–6 weeks |
The upshot? Knife sharpening with a stone gives you the best balance of precision and economy over time. The learning curve is real, but once you've got the muscle memory, nothing else comes close for maintaining high-quality steel.
Essential Diagnostic Tools for Your DIY Toolkit in 2026
Right, let's shift gears. If you're the sort of person who maintains their own knives, chances are you're also the sort who tackles electrical and network jobs around the house. A proper tool kit for DIY should cover more than just hammers and screwdrivers.
This spring, I've been expanding my own kit with some diagnostic gear that's genuinely useful — not just gadgets collecting dust in the garage. (And yes, I do have a drawer full of gadgets collecting dust in the garage. We all do.) Here's what I'd consider essential tools for DIY in 2026:
Network Testing Equipment
If you've ever run Ethernet cable through walls (and living in Belfast, I've done this in three different houses now), you'll know the frustration of a dead connection. A decent network cable tester or RJ45 tester saves hours of troubleshooting. These devices check continuity, wire mapping, and can identify shorts or crossed pairs in seconds.
A LAN tester typically costs between £15 and £60 for home use. Professional-grade ethernet testers with cable length measurement and PoE detection run £80–£200. For most DIY jobs, a basic network tester with LED pass/fail indicators does the job., meeting British quality expectations
Wire Trackers and Cable Finders
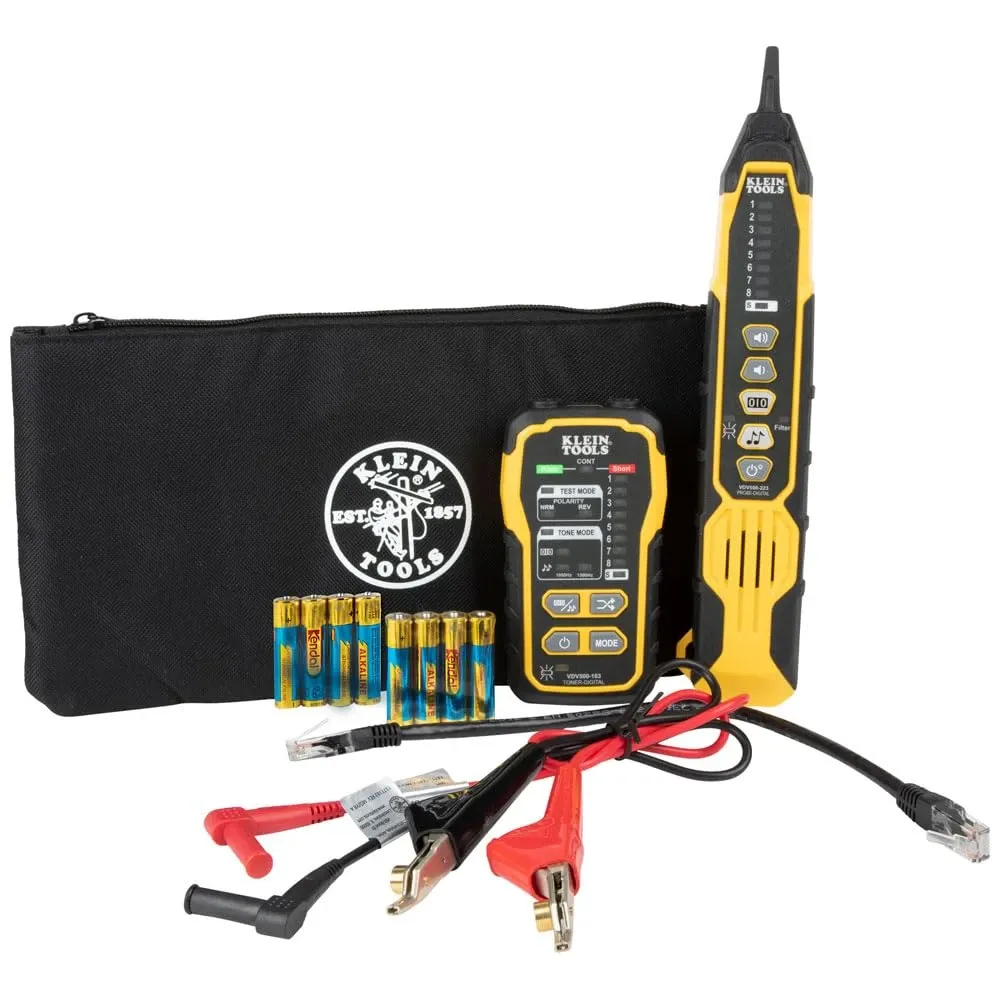
A tone generator paired with a cable tracer probe is indispensable when you're trying to identify which cable goes where in a bundle. The tone generator injects a signal; the probe picks it up through walls, ceilings, and cable bundles without needing to disconnect anything.
The klntlsnet professional-grade tracing solution at £194.22 features both digital and analog signalling for identifying Ethernet, telco, and low-voltage wiring — even in noisy environments where cheaper units struggle. That's the kind of cable finder and wire tracker that pays for itself on the first job where you'd otherwise be pulling cables blind.
Cable Tracers, Tone Generators & Network Testers: What to Look For
Not all tone and probe sets are created equal. So what separates a decent unit from a frustrating one?
Key Specifications
- Signal modes: Digital signalling cuts through interference from adjacent cables. Analog-only units work fine in simple runs but fail in dense cable bundles.
- Tracing distance: Budget units manage 300m on clean runs. Professional sets handle 1,500m+ with signal attenuation compensation.
- Connector compatibility: Look for RJ11, RJ45, coax, and bare-wire clips as standard. Some units add alligator clips for low-voltage tracing.
- Battery life: 20–40 hours typical. Rechargeable lithium units are becoming standard in 2026.
I've used budget wire trackers that cost under £30. They work — sort of. In a quiet residential setting with maybe 4–5 cables in a bundle, they're fine. But try using one in a commercial patch panel or a house with foil-backed insulation acting as interference, and you'll be tearing your hair out. That's where spending £100+ on a proper probe testing kit makes sense.
For more on probe identification and compatibility, the klntlsnet probe set identification guide covers cross-referencing between different manufacturer systems.
Power Probe 3, Power Probe 4 & Back Probe Kits

The Power Probe 3 and Power Probe 4 are circuit testers designed primarily for automotive diagnostics, but they've found a solid following among DIY electricians and trade professionals working on 12V and 24V systems.
Power Probe 3 vs Power Probe 4
The Power Probe 4 builds on the PP3 with a larger backlit display, improved voltage accuracy (±0.1V versus ±0.3V on the PP3), and integrated component testing. The Power Probe 4 Snap-On variant is the same unit distributed through Snap-On's tool truck network — identical specs, different branding and warranty channel.
One thing to note: Power Probe 4 fuse replacement uses a standard 10A blade fuse accessible via the battery compartment. Don't overtighten the cap — I've seen cracked housings from people forcing it.
Back Probe Kits and Wire Piercing Probes
A back probe kit lets you test voltage at a connector without disconnecting it. The back probe pins slide alongside the terminal contact, giving you a live reading while the circuit operates normally. Essential for intermittent fault diagnosis., popular across England
Wire piercing probes work differently — they puncture the insulation to make contact with the conductor. Useful, but they do leave a tiny hole that should be sealed with liquid electrical tape afterwards to prevent corrosion. The BSI standards for automotive wiring (BS AU 14a) specify that any insulation breach must be re-sealed to maintain IP rating.
For detailed probe specifications and compatibility data, check the klntlsnet Agilent probe ID reference.
Frequently Asked Questions
What grit whetstones knife sharpening stone should a beginner buy?
A 1000/6000 combination stone is the best starting point for beginners. The 1000 grit side handles regular sharpening, while 6000 provides a polished finish. Expect to spend £30–£50 for a quality synthetic stone that measures at least 180mm × 60mm × 30mm. Smaller stones make maintaining a consistent angle much harder.
How often should I sharpen my knives on a stone?
For home kitchen use, sharpen every 2–4 weeks depending on usage. A honing steel between sessions extends this to 4–6 weeks. Professional chefs typically sharpen weekly. You'll know it's time when the blade won't cleanly slice through a ripe tomato skin without pressure — that's roughly when the edge radius exceeds 0.5 micrometres.
Do I need to soak a whetstone before use?
Most synthetic aluminium oxide stones require 10–15 minutes of soaking until air bubbles stop rising. Splash-and-go stones (typically ceramic or resin-bonded) only need surface water applied during use. Never soak oil stones in water — they require honing oil. Check the manufacturer's instructions, as soaking a splash-and-go stone can cause cracking over time.
What's the difference between a tone generator and a cable tracer?
A tone generator is the transmitter — it injects an audible signal onto a wire. The cable tracer (or probe) is the receiver that detects that signal through insulation and walls. They work as a pair. Professional sets like the klntlsnet unit at £194.22 include both digital and analog modes, allowing identification in bundles of 50+ cables where analog-only sets produce false positives.
Can I use a network cable tester on live PoE circuits?
Basic RJ45 testers should never be connected to live PoE circuits — the 48V DC can damage the tester's electronics. Professional-grade ethernet testers rated for PoE detection (802.3af/at/bt) can safely identify and measure PoE voltage up to 57V. Always check your tester's maximum input voltage rating before connecting to any potentially powered cable.
Is the Power Probe 4 fuse user-replaceable?
Yes. The Power Probe 4 uses a standard 10A mini blade fuse located in the battery compartment. Replacement takes under 30 seconds — unscrew the cap, swap the fuse, and reseal. Use only 10A rated fuses; higher ratings defeat the overcurrent protection and risk damaging the internal circuitry. Replacement fuses cost approximately £0.50 each from any motor factors.
Key Takeaways
- A whetstones knife sharpening stone (1000/6000 grit combination) covers 90% of domestic and professional sharpening needs — budget £30–£50 for a quality synthetic stone.
- Knife sharpening on a stone removes 0.01–0.05mm per pass, preserving blade life 4–6× longer than electric sharpeners.
- Maintain a consistent 15–20° angle for kitchen knives; use the coin-stack method until muscle memory develops.
- Professional cable tracing requires both digital and analog signalling — the klntlsnet solution at £194.22 handles noisy environments where budget units fail.
- A proper DIY toolkit in 2026 should include network testing gear — even a basic RJ45 tester (£15–£30) saves hours on home cabling projects.
- Back probe pins and wire piercing probes serve different purposes — back probes are non-destructive; piercing probes require re-sealing per BSI standards.
- Always match your tools to the job complexity — overspending on features you won't use is as wasteful as buying cheap gear that fails when you need it most.
Ready to upgrade your diagnostic kit with KleinTools Net?
Shop Professional Kits — £676.13